Why You’ll Love This Recipe
-
It’s fast enough for weeknights, but tastes like a “real dinner.”
-
The garlic butter flavor is bold without being harsh.
-
The chicken stays juicy, not dry or stringy.
-
The filling is creamy and melty without needing a complicated sauce.
-
You can scale it up easily for family or guests.
-
Great for using leftover chicken, too.
-
The wraps toast beautifully, crispy outside, soft inside.
-
Easy to customize with veggies, heat, or extra herbs.
-
Kid-friendly, but still satisfying for adults.
-
It reheats better than most wraps when you use a skillet or air fryer.
Ingredients
-
Z1 ½ lbs boneless, skinless chicken breast or thighs, sliced into thin strips
-
1 tbsp olive oil
-
1 tsp paprika
-
1 tsp Italian seasoning
-
¾ tsp salt (plus more to taste)
-
½ tsp black pepper
-
½ tsp onion powder (optional, but nice)
-
2 tbsp butter
-
5–6 garlic cloves, minced (adjust to taste)
-
4 oz cream cheese, softened
-
¼ cup sour cream or plain Greek yogurt
-
½ cup shredded mozzarella
-
½ cup shredded cheddar (or Monterey Jack)
-
¼ cup grated Parmesan
-
2 tbsp chopped parsley (or 1 tsp dried)
-
1–2 tbsp milk (only if needed to loosen the mixture)
-
4 large flour tortillas (burrito-size)
-
Optional add-ins: baby spinach, thinly sliced peppers, sautéed onions, jalapeños, hot sauce, pickles
Preparation or Quick Marination
If you have 10 minutes, toss the sliced chicken with olive oil, paprika, Italian seasoning, salt, pepper, and onion powder. Let it sit while you mince the garlic and shred the cheese. It’s not a “deep” marinade, but it gives the seasoning time to settle into the chicken so it tastes seasoned all the way through.
If you don’t have time, no problem—season it and cook right away. This recipe is forgiving like that.
INSTRUCTION
-
Slice and season the chicken. Cut the chicken into thin strips so it cooks quickly and stays tender. Coat with oil and spices until evenly covered.
-
Warm a skillet. Heat a large skillet over medium-high heat. You want it hot enough to sear, but not so hot that the spices burn.
-
Cook the chicken. Add the chicken in a single layer. Let it cook undisturbed for 2–3 minutes so you get a light golden color, then stir and finish cooking until no pink remains, about 6–8 minutes total.
-
Lower the heat. Reduce the heat to medium-low. Push the chicken to one side of the skillet or remove it briefly to a plate.
-
Melt the butter. Add butter to the empty side of the pan. Once it melts, stir in the minced garlic.
-
Let the garlic bloom. Cook garlic for 30–60 seconds, stirring often. You’re looking for a gentle sizzle and a deep aroma, not browning.
-
Build the creamy base. Add cream cheese and stir until it softens and starts to melt into the garlic butter. It will look a little messy at first; keep stirring.
-
Smooth it out. Stir in sour cream or Greek yogurt. If the mixture seems too thick, add a splash of milk just enough to make it creamy and spreadable.
-
Melt the cheese. Add mozzarella, cheddar, and Parmesan. Stir until the cheese melts and the mixture looks glossy and cohesive. You should see gentle bubbling, not aggressive boiling.
-
Combine with chicken. Return the chicken to the sauce and toss until everything is coated. Finish with parsley and taste for salt and pepper.
-
Fill the tortillas. Spoon the filling down the center of each tortilla. Don’t overfill too much makes wrapping difficult and can cause leaks.
-
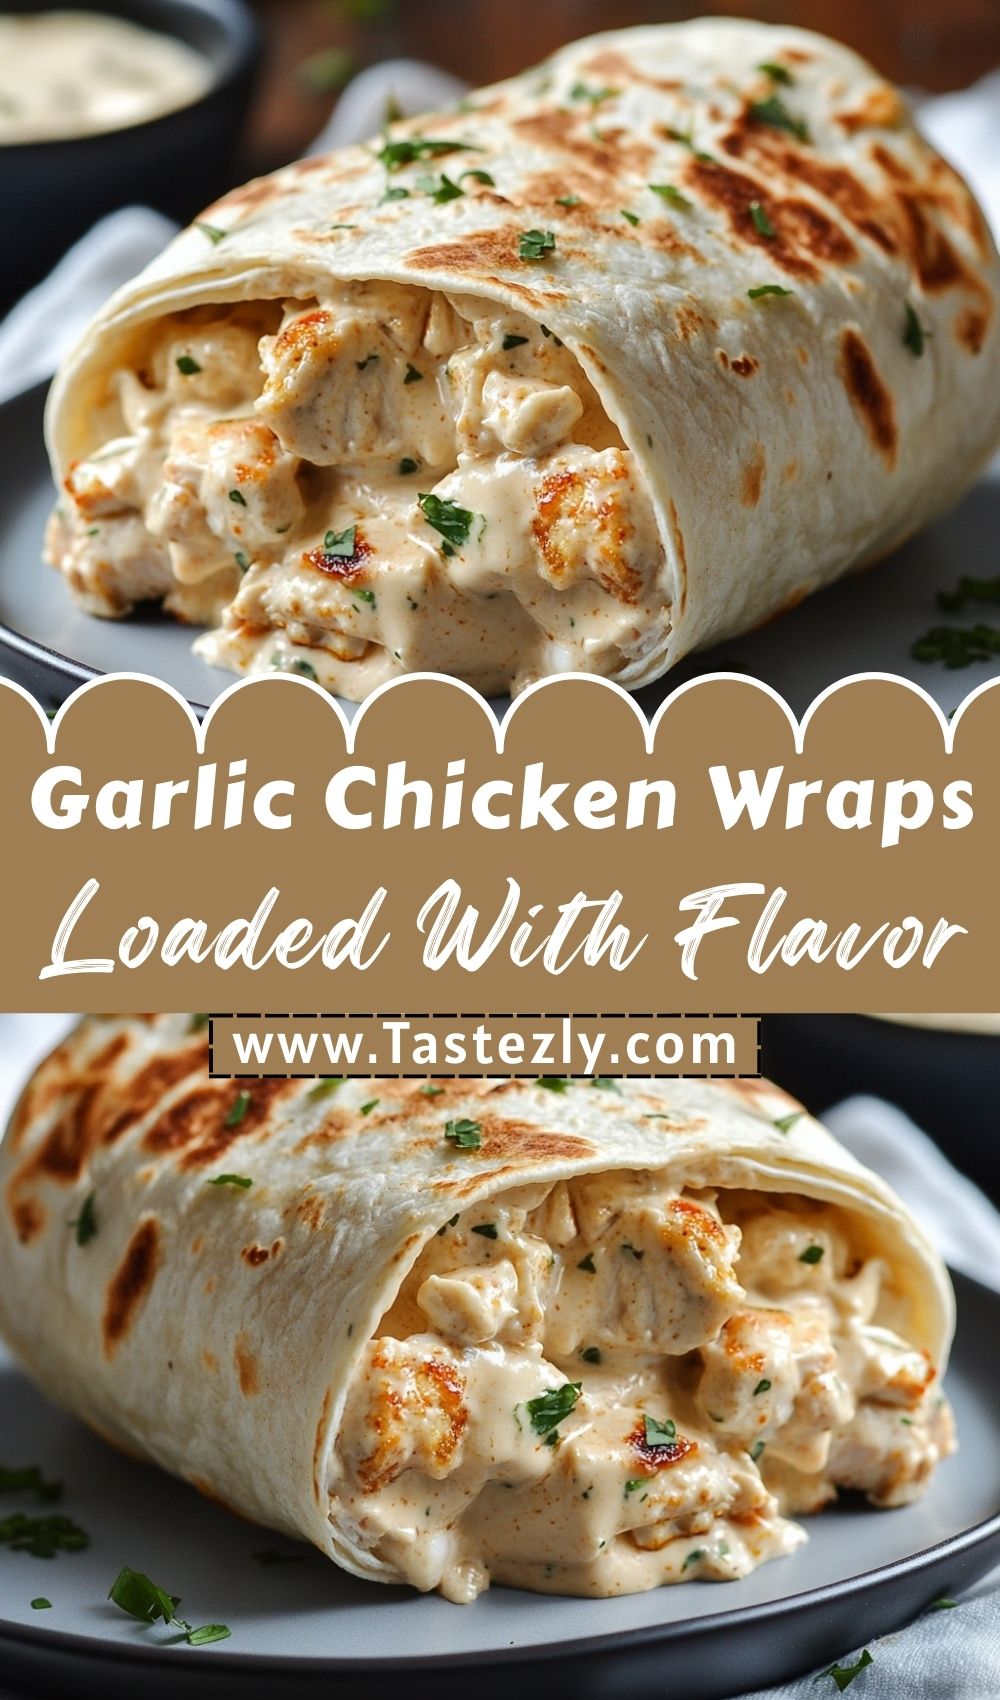
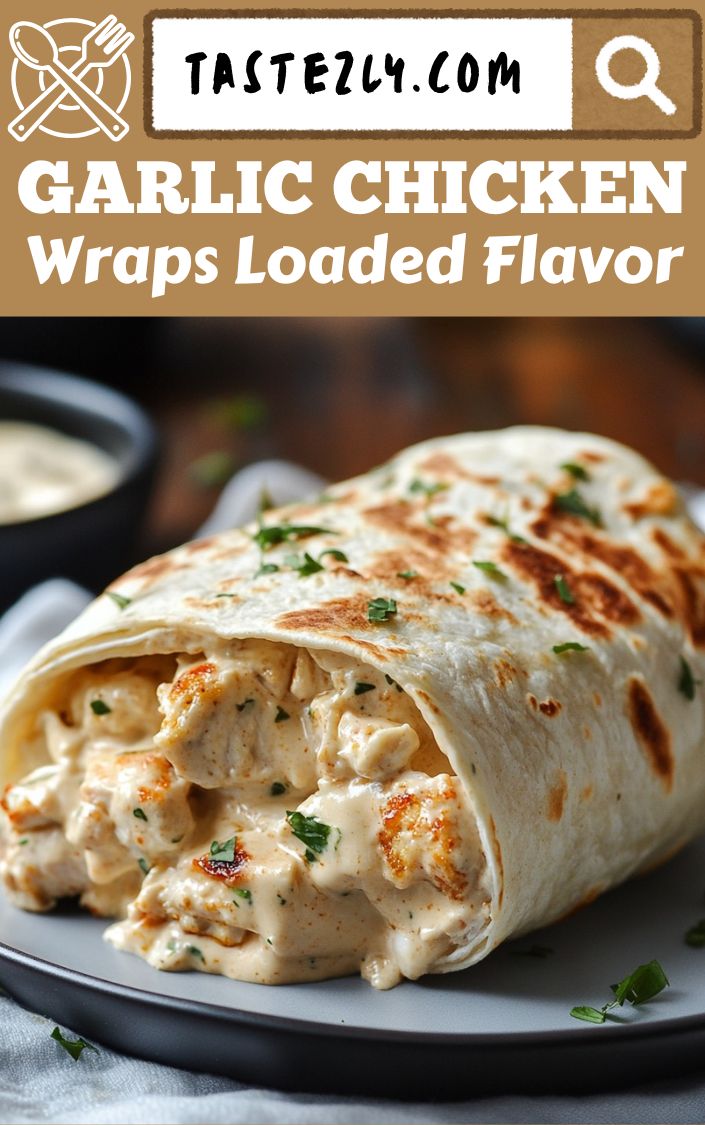
Wrap and toast. Fold like a burrito (tuck sides in, then roll). Toast seam-side down in a clean skillet over medium heat for 2 minutes per side, until golden and lightly crisp. The outside should feel firm, and the inside should be hot and melty.
Recipe Time and Details
-
Prep Time: 15 minutes
-
Cook Time: 15 minutes
-
Total Time: 30 minutes
-
Servings: 4 wraps
-
Courses: Main Course
-
Cuisines: American
- Calories: ~560 per wrap (estimate)
Flavor and Texture Tips
-
Slice the chicken thin. Thin strips cook fast and stay juicy. Thick chunks take longer and dry out more easily.
-
Keep garlic on medium-low. Garlic turns bitter when it browns too much. You want fragrant and soft, not toasted.
-
Shred your own cheese if possible. Pre-shredded blends can be a little grainy due to anti-caking agents.
-
Don’t boil the sauce. Gentle heat keeps the dairy smooth; high heat can separate it. Look for a soft bubble, not a rolling simmer.
-
Toast the wrap last. That quick skillet toast gives you the best contrast: crisp exterior, creamy center.
Serving Ideas
These cheesy garlic chicken wraps are satisfying on their own, but they’re even better with something fresh or crunchy on the side:
-
A simple chopped salad with lemony dressing
-
Oven fries, sweet potato wedges, or air fryer tater tots
-
Crunchy pickles or pickled onions to cut the richness
-
A cup of tomato soup for a cozy “wrap and dip” dinner
-
Extra sauce for dipping: ranch, garlic aioli, or a little hot honey if you like sweet heat
Storage and Reheating
-
Fridge: Store wrapped or fillings separately. in an airtight container for up to 3 days.
-
Best reheat: Warm in a skillet over medium-low so the tortilla re-crisps and the filling heats evenly.
-
Air fryer: 350°F for 6 minutes works great for crisping.
-
Microwave: It works, but the tortilla will soften. Wrap it in a paper towel and heat in short bursts.
-
Freezer: Freeze the filling for up to 2 months. Tortillas can be frozen, too, but toasted wraps are best fresh.
Recipe Notes
-
Chicken choice matters. Thighs stay naturally juicy and forgiving; breasts work perfectly if you slice them thin and don’t overcook.
-
Seasoning is your foundation. Even though the sauce is rich, the chicken should taste seasoned on its own. If it tastes bland before the sauce, it will taste bland after.
-
Control the garlic. If your garlic is very strong or you’re sensitive to it, start with 3–4 cloves. You can always add more next time.
-
Cream cheese texture tip. Softened cream cheese melts faster and more smoothly. If it’s cold, cube it and give it an extra minute or two, stirring constantly.
-
Use milk only as needed. The goal is a thick, creamy filling that clings to the chicken. Too much liquid makes it runny and more likely to leak from the wrap.
-
Cheese order helps. Stir in mozzarella and cheddar first, they melt smoothly, then Parmesan last for salty depth.
-
Taste before wrapping. This is your moment to adjust—more pepper, more salt, a pinch of chili flakes, or a squeeze of lemon to brighten everything.
-
Cool slightly if over-melty. If the filling is extremely hot and runny, let it sit 3 minutes before wrapping. It thickens as it cools.
-
Wrap technique saves the day. Don’t overfill. Keep the filling centered. Tuck the sides in snugly, then roll it tightly so it toasts neatly.
-
Toast seam-side down first. This seals the wrap and prevents it from opening during flipping.
-
Keep the heat moderate while toasting. Medium is ideal for high, and the tortilla browns before the inside warms; too low and it dries out.
-
Make it your own. Add sautéed peppers, spinach, crispy bacon bits, or a drizzle of hot sauce inside before rolling.
FAQs
1) Can I use rotisserie chicken instead of cooking fresh chicken?
Yes. Shred or chop it, then warm it in the garlic butter sauce until it’s hot. It’s a great shortcut.
2) How do I keep the wraps from getting soggy?
Toast them in a skillet or air fryer. Also, keep the filling thick; avoid adding too much milk to the sauce.
3) What cheese blend works best if I don’t have all three?
Mozzarella plus cheddar or Monterey Jack is plenty. Parmesan adds extra savory depth, but it’s optional.
4) Can I make the filling ahead of time?
Absolutely. Make the chicken and sauce, cool, and refrigerate. Reheat gently, then assemble and toast fresh.
Conclusion
There’s something comforting about a dinner you can hold in your hands, especially when it’s warm, crisp on the outside, and creamy in the middle. These cheesy garlic chicken wraps are one of those recipes that feel like they understand real life. You don’t need special equipment, complicated steps, or a long ingredient list. You just need a skillet, a little garlic, and a handful of ingredients that complement each other well.
What makes them worth repeating isn’t only the flavor, though that buttery garlic and melted cheese situation is hard to beat. It’s the way the recipe fits into a busy evening. You can make it quickly, serve it casually, and still feel like you made something satisfying. And if you’re feeding different tastes at the table, it’s easy to customize by adding heat, adding veggies, swapping cheeses, or keeping it simple.
Cheesy Garlic Chicken Wraps Loaded With Flavor
Ingredients
Method
- Slice and season the chicken. Cut chicken into thin strips so it cooks quickly and stays tender. Coat with oil and spices until evenly covered.
- Warm a skillet. Heat a large skillet over medium-high heat. You want it hot enough to sear, but not so hot that the spices burn.
- Cook the chicken. Add the chicken in a single layer. Let it cook undisturbed for 2–3 minutes so you get a light golden color, then stir and finish cooking until no pink remains (about 6–8 minutes total).
- Lower the heat. Reduce heat to medium-low. Push the chicken to one side of the skillet (or remove it briefly to a plate).
- Melt the butter. Add butter to the empty side of the pan. Once it melts, stir in the minced garlic.
- Let the garlic bloom. Cook garlic for 30–60 seconds, stirring often. You’re looking for a gentle sizzle and a deep aroma—not browning.
- Build the creamy base. Add cream cheese and stir until it softens and starts to melt into the garlic butter. It will look a little messy at first; keep stirring.
- Smooth it out. Stir in sour cream (or Greek yogurt). If the mixture seems too thick, add a splash of milk—just enough to make it creamy and spreadable.
- Melt in the cheese. Add mozzarella, cheddar, and Parmesan. Stir until the cheese melts and the mixture looks glossy and cohesive. You should see gentle bubbling, not aggressive boiling.
- Combine with chicken. Return the chicken to the sauce and toss until everything is coated. Finish with parsley and taste for salt and pepper.
- Fill the tortillas. Spoon the filling down the center of each tortilla. Don’t overfill—too much makes wrapping difficult and can cause leaks.
- Wrap and toast. Fold like a burrito (tuck sides in, then roll). Toast seam-side down in a clean skillet over medium heat for 1–2 minutes per side, until golden and lightly crisp. The outside should feel firm, and the inside should be hot and melty.
Notes
- Chicken choice matters. Thighs stay naturally juicy and forgiving; breasts work perfectly if you slice them thin and don’t overcook.
- Seasoning is your foundation. Even though the sauce is rich, the chicken should taste seasoned on its own. If it tastes bland before the sauce, it will taste bland after.
- Control the garlic. If your garlic is very strong or you’re sensitive to it, start with 3–4 cloves. You can always add more next time.
- Cream cheese texture tip. Softened cream cheese melts faster and more smoothly. If it’s cold, cube it and give it an extra minute or two, stirring constantly.
- Use milk only as needed. The goal is a thick, creamy filling that clings to the chicken. Too much liquid makes it runny and more likely to leak from the wrap.
- Cheese order helps. Stir in mozzarella and cheddar first (they melt smoothly), then Parmesan last for salty depth.
- Taste before wrapping. This is your moment to adjust—more pepper, more salt, a pinch of chili flakes, or a squeeze of lemon to brighten everything.
- Cool slightly if over-melty. If the filling is extremely hot and runny, let it sit 2–3 minutes before wrapping. It thickens as it cools.
- Wrap technique saves the day. Don’t overfill. Keep the filling centered. Tuck the sides in snugly, then roll it tightly so it toasts neatly.
- Toast seam-side down first. This seals the wrap and prevents it from opening during flipping.
- Keep the heat moderate while toasting. Medium is ideal—too high and the tortilla browns before the inside warms; too low and it dries out.
- Make it your own. Add sautéed peppers, spinach, crispy bacon bits, or a drizzle of hot sauce inside before rolling.