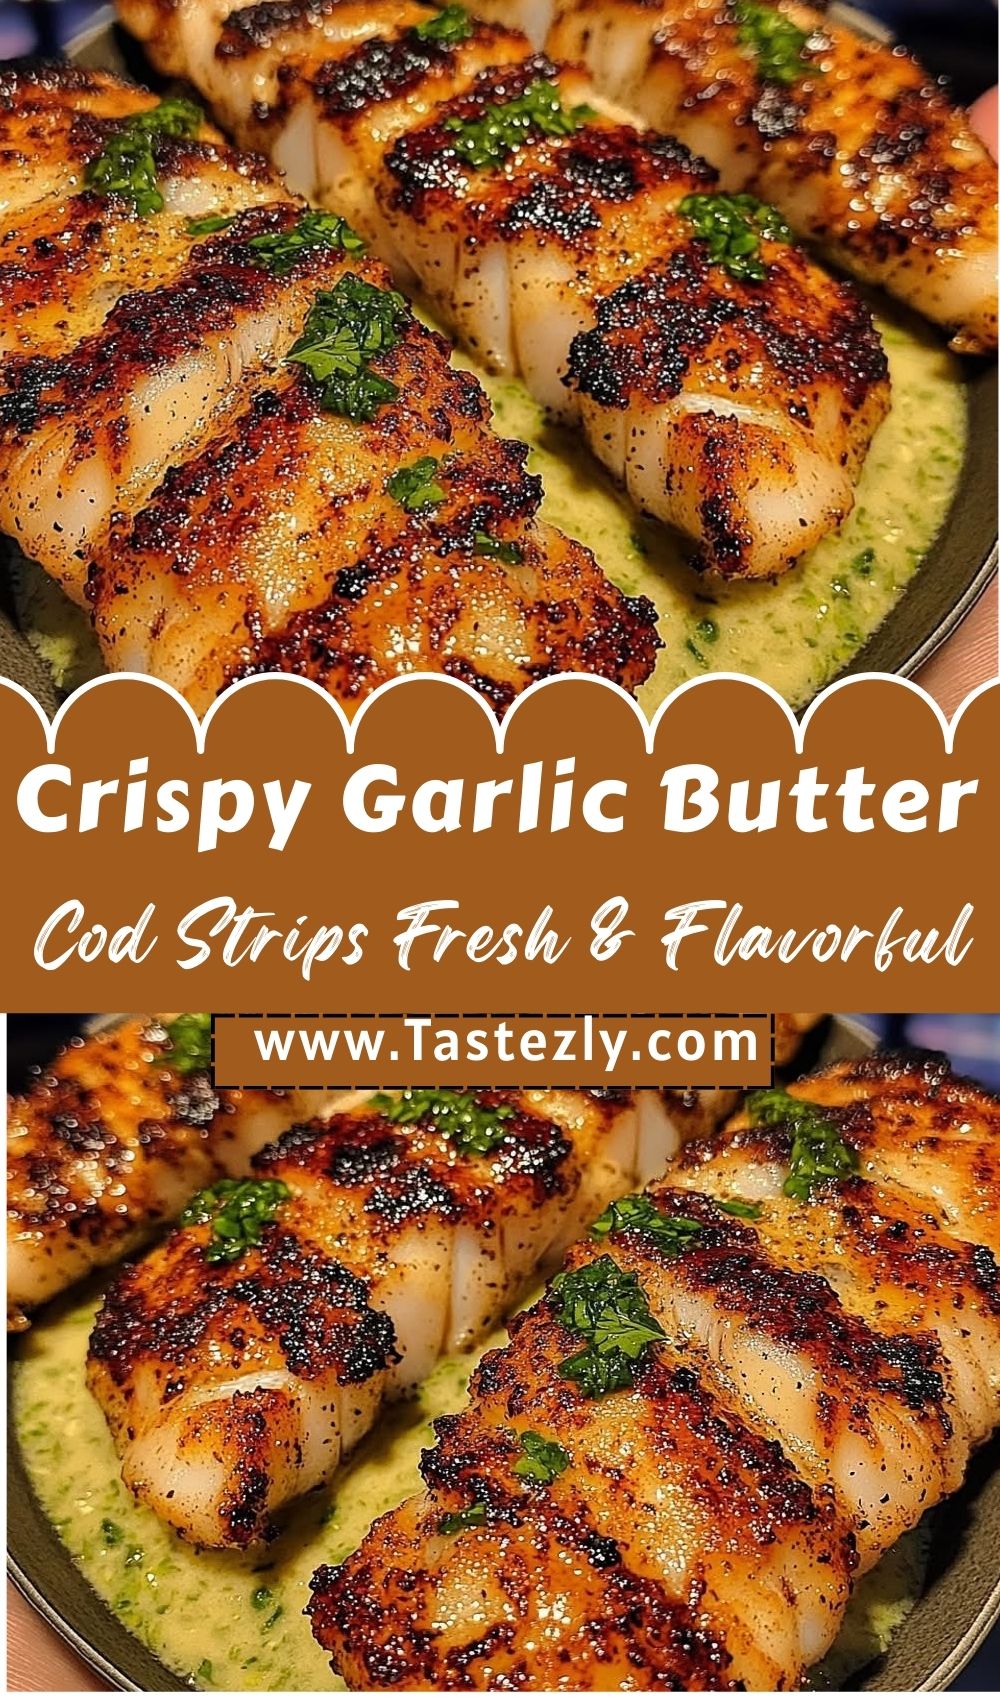
Crispy Garlic Butter Cod Strips, Fresh & Flavorful, are the kind of dinner that feels clean and comforting at the same time. The moment you pat the fish dry and season it, you can already tell it’s going to be good. Cod has this mild, fresh scent that doesn’t fight you; it just quietly promises something tender. When the pan warms up, and the first strip hits the oil, there’s a soft, steady sizzle that sounds like dinner is finally under control. You watch the coating turn from pale to golden, little bubbles forming at the edges, and the kitchen starts to smell like toasted butter and garlic, simple, familiar, and honestly hard to ignore.
I make this when I want seafood that feels easy, not complicated. Cod is naturally mild, which makes it a perfect canvas for garlic butter. And when you cut it into strips, it cooks quickly and evenly, which means you’re not standing over the stove wondering if the center is done. You’re just looking for the signs: a crisp outside, a flaky interior, and that gentle firmness when you press it lightly with a spatula. It’s the kind of cooking that’s more about paying attention than following strict rules.
What I love most is how flexible these cod strips are once they’re done. You can pile them onto a plate with lemon wedges and a salad, tuck them into warm tortillas with slaw, or serve them alongside fries and call it a cozy fish-and-chips-inspired night. The garlic butter takes everything up a level, especially when you spoon a little extra over the top right before serving. Crispy garlic butter cod strips, fresh & flavorful, are a seafood main that feels light but satisfying, and it comes together quickly enough to make it realistic on a weeknight, even when the day’s been long.
Why You’ll Love This Recipe
-
Crispy outside, tender and flaky inside, exactly what cod does best.
-
Garlic butter adds big flavor without heavy sauces.
-
Quick cook time, so it’s perfect for busy weeknights.
-
Uses simple ingredients you likely already have.
-
Cod strips cook evenly and are hard to overcomplicate.
-
Great for dipping, wrapping, or serving as a main with sides.
-
Mild flavor makes it family-friendly, even for seafood skeptics.
-
Works with fresh or properly thawed frozen cod.
-
Easy to adjust: spicier, more lemony, more herby, your choice.
-
Leftovers can be repurposed into tacos, salads, or bowls.
Ingredients
For the cod strips:
-
1 1/2 lbs cod fillets, cut into 1-inch strips
-
1 tsp salt (plus more to taste)
-
1/2 tsp black pepper
-
1 tsp paprika (optional, adds color)
-
1 tsp garlic powder
-
1/2 tsp onion powder (optional)
-
1/2 cup all-purpose flour (light coating)
-
1/2 cup cornstarch (for extra crisp)
-
1 large egg (optional, helps coating stick; see note below)
-
2-3 tbsp oil for pan-frying (avocado, canola, or light olive oil)
-
3 tbsp butter
-
4 cloves garlic, minced
-
Zest of 1 lemon (optional but bright)
-
1-2 tbsp lemon juice (to serve)
-
1 tbsp chopped parsley (optional)
-
Pinch of red pepper flakes (optional)
-
Lemon wedges
-
Tartar sauce or a simple mayo-lemon dip (optional)
Preparation (simple and conversational)
The most important step with cod is drying it well. Fish holds moisture on the surface, and moisture fights crispiness. Pat each piece dry with paper towels and let it sit for a minute while you mix your coating.
You don’t need a long marinade here. Cod is mild and delicate, and the flavor comes from seasoning plus that garlic butter finish. A quick seasoning rest, just 5 to 10 minutes,s gives the salt time to settle in. If you’re using frozen cod, thaw completely and press gently with paper towels to remove extra water. That one step makes a noticeable difference in texture.
Coating note: You can keep it simple with a flour-cornstarch dredge, or you can add a quick egg dip for a slightly thicker crust. Both work. If you want the lightest, crispest coating, skip the egg and dredge straight through the dry mix.
INSTRUCTION
-
Pat cod fillets dry, then slice into even strips. Season with salt, pepper, garlic powder, and paprika.
-
In a shallow bowl, mix flour and cornstarch with a pinch of salt and pepper.
-
Optional: In a second bowl, whisk one egg with a tablespoon of water for an egg wash.
-
Heat a large skillet over medium-high heat and add oil. It should shimmer but not smoke.
-
Dredge each cod strip in the flour-cornstarch mixture, shaking off excess. If using egg, dip in egg first, then dredge.
-
Place coated strips into the hot pan in a single layer. You should hear a steady, gentle sizzle.
-
Cook 2–3 minutes on the first side until golden and crisp at the edges.
-
Flip carefully and cook another 2-3 minutes, until the coating is deep golden and the fish flakes easily.
-
Transfer cooked strips to a rack or paper towel-lined plate. Keep warm while you finish the batch.
-
Reduce the heat to medium-low. In the same pan, add butter. Let it melt and bubble gently.
-
Stir in minced garlic and cook 30-45 seconds until fragrant. Add lemon zest if using.
-
Return cod strips briefly to the pan (or drizzle the butter over them) and toss gently. Finish with parsley and lemon juice, then serve immediately.
Recipe Time and Details
-
Prep Time: 15 minutes
-
Cook Time: 10 minutes
-
Total Time: 25 minutes
-
Servings: 4
-
Courses: Main Course / Seafood
-
Cuisines: American / Coastal-inspired
-
Keywords: crispy garlic butter cod strips,
-
Calories: 320 per serving (estimate, depends on oil/butter and portion size)
Flavor and Texture Tips
-
Dry the fish thoroughly. This is the difference between crisp and soggy.
-
Don’t overcrowd the pan. Crowding traps steam and softens the coating. Cook in batches.
-
Use cornstarch for crunch. Even a 50/50 flour-cornstarch mix creates a lighter, crispier shell.
-
Add garlic ata lower heat. Garlic burns quickly, so keep it gentle so it turns fragrant, not bitter.
-
Finish with lemon at the end. Lemon brightens the butter and keeps the dish tasting fresh.
Serving Ideas
These cod strips work in so many easy ways. For a simple dinner, serve them with roasted potatoes or fries, a crisp slaw, and lemon wedges. If you want something lighter, pair them with a cucumber salad or a mixed greens salad with a tangy vinaigrette.
They also make great tacos: warm tortillas, shredded cabbage, a little mayo-lime sauce, and a few cod strips tucked inside. Or build a seafood bowl with rice, avocado, crunchy veggies, and a drizzle of the leftover garlic butter. If you’re serving kids, keep it classic with ketchup or a mild tartar sauce. Cod’s mild flavor makes it an easy sell.
Storage and Reheating
-
Refrigerate: Store leftovers in an airtight container for up to 2 days.
-
Reheat (best): Air fryer at 375°F for 4-6 minutes until crisp again.
-
Oven option: 400°F for 8–10 minutes on a baking sheet.
-
Avoid the microwave: It softens the coating and can make fish rubbery.
Recipe Notes
-
Choose cod that looks firm and smells clean. Fresh cod should smell like the ocean, not “fishy.” If using frozen, thaw overnight in the fridge and pat dry thoroughly before seasoning.
-
Cut evenly. Strips that are similar in thickness cook at the same pace, which keeps you from overcooking thin pieces while thicker ones catch up.
-
Season simply but confidently. Cod is mild, so it benefits from a clear base seasoning. Salt, pepper, garlic powder, and paprika give you flavor without masking the fish.
-
Use a light dredge. A flour-cornstarch mix creates a crisp, delicate coating. Too much coating can feel heavy and can separate from the fish. Shake off the excess before frying.
-
Watch your oil temperature. If the oil is too cool, the coating absorbs oil and turns soft. If it’s too hot, the outside browns before the fish cooks through. Medium-high heat with a steady sizzle is the sweet spot.
-
Don’t move the fish too soon. Let it sit for the first couple of minutes so the crust sets. When it’s ready to flip, it releases more easily from the pan and holds its shape.
-
Keep cooked strips crisp by placing them on a rack. A rack allows air flow underneath, so steam doesn’t soften the bottom.
-
Garlic butter goes in last. Butter can brown quickly, and garlic can burn even faster, so lower the heat before adding them. You want a gentle bubble and a fragrant aroma, not dark garlic.
-
Finish with lemon and herbs. Lemon wakes up the richness of the butter, and parsley adds a fresh note that makes the whole plate taste brighter.
FAQs
-
Can I bake these instead of pan-frying?
Yes. Bake at 425°F on a rack for about 15 minutes, flipping halfway. Lightly spray with oil for crisping. -
Why is my coating not crispy?
Usually, the fish wasn’t dried enough, the oil wasn’t hot, or the pan was overcrowded. Pat dry and cook in batches. -
Can I use another fish besides cod?
Absolutely. Haddock, pollock, or tilapia work well. Adjust cooking time based on thickness. -
How do I know the cod is done?
It should turn opaque and flake easily with a fork. The strips will feel gently firm, not mushy.
Conclusion
Crispy Garlic Butter Cod Strips, Fresh & Flavorful, are a reminder that seafood doesn’t have to be complicated to feel special. With just a few simple steps, drying the fish, seasoning it well, and cooking it until golden, you end up with something that tastes clean, comforting, and satisfying. The garlic butter finish does a lot of work here, adding warmth and richness without hiding the delicate flavor of the cod. And the lemon at the end keeps everything tasting bright and fresh.
What I love about this recipe is how easily it fits into real life. It’s quick enough for a weeknight, but it still feels like a meal you chose on purpose. You can keep it simple with a salad and lemon wedges, or you can turn it into tacos or bowls, depending on what you have in the fridge. Either way, it’s the kind of main course that doesn’t feel heavy, but still leaves you content.

Crispy Garlic Butter Cod Strips Fresh & Flavorful
Ingredients
Method
- Pat cod fillets dry, then slice into even strips. Season with salt, pepper, garlic powder, and paprika.
- In a shallow bowl, mix flour and cornstarch with a pinch of salt and pepper.
- Optional: In a second bowl, whisk one egg with a tablespoon of water for an egg wash.
- Heat a large skillet over medium-high heat and add oil. It should shimmer but not smoke.
- Dredge each cod strip in the flour-cornstarch mixture, shaking off excess. If using egg, dip in egg first, then dredge.
- Place coated strips into the hot pan in a single layer. You should hear a steady, gentle sizzle.
- Cook 2–3 minutes on the first side until golden and crisp at the edges.
- Flip carefully and cook another 2–3 minutes, until the coating is deep golden and the fish flakes easily.
- Transfer cooked strips to a rack or paper towel-lined plate. Keep warm while you finish the batch.
- Reduce heat to medium-low. In the same pan, add butter. Let it melt and bubble gently.
- Stir in minced garlic and cook 30–45 seconds until fragrant. Add lemon zest if using.
- Return cod strips briefly to the pan (or drizzle the butter over them) and toss gently. Finish with parsley and lemon juice, then serve immediately.
Notes
- Choose cod that looks firm and smells clean. Fresh cod should smell like the ocean, not “fishy.” If using frozen, thaw overnight in the fridge and pat dry thoroughly before seasoning.
- Cut evenly. Strips that are similar in thickness cook at the same pace, which keeps you from overcooking thin pieces while thicker ones catch up.
- Season simply but confidently. Cod is mild, so it benefits from a clear base seasoning. Salt, pepper, garlic powder, and paprika give you flavor without masking the fish.
- Use a light dredge. A flour-cornstarch mix creates a crisp, delicate coating. Too much coating can feel heavy and can separate from the fish. Shake off the excess before frying.
- Watch your oil temperature. If the oil is too cool, the coating absorbs oil and turns soft. If it’s too hot, the outside browns before the fish cooks through. Medium-high heat with a steady sizzle is the sweet spot.
- Don’t move the fish too soon. Let it sit for the first couple of minutes so the crust sets. When it’s ready to flip, it releases more easily from the pan and holds its shape.
- Keep cooked strips crisp by placing them on a rack. A rack allows air flow underneath, so steam doesn’t soften the bottom.
- Garlic butter goes in last. Butter can brown quickly, and garlic can burn even faster, so lower the heat before adding them. You want a gentle bubble and a fragrant aroma, not dark garlic.
- Finish with lemon and herbs. Lemon wakes up the richness of the butter, and parsley adds a fresh note that makes the whole plate taste brighter.